System Overview
This project stems from the idea of getting better camera angles for live streams or videos. Our goal was to make a functional drone from scratch which could be controlled with a simple remote control but also work autonomously by tracking a designated face and autonomously pathing to keep this designated person’s face in frame at all times. We wanted this drone to be able to be completely autonomous as its own entity which is why we installed a Nvidia Jetson for onboard computing processes. Our motivations include our passion for drones and videography as well as wanting to work on something that is challenging. We were searching for a project to do that could implement computer vision, as it is a field we are all interested in. Integrating cv in a drone was a good challenge for our team with extensive real-world applications, including humanitarian demining. Additionally, we hope this project can be used by filmmakers to vlog and record without needing drone pilots.
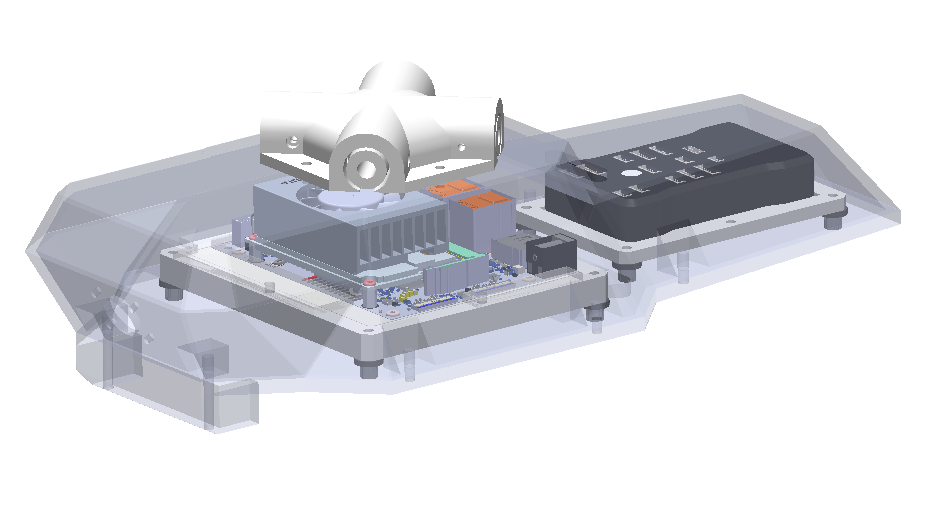
System and Energy Diagram
Design Decisions
Bill of Materials
Integration Process
We encountered a variety of issues between designing our drone to finally getting it working. One of our
first issues was incorrect tolerancing for the propeller mounting hub due to printing on the Stratasys
instead of the Prusa printers. We resolved this by re-tolerancing the part and reprinting our propeller
mounting hub. After getting the motors connected to power, we realized that the four motors did not spin
with a consistent and equal amount of torque. During our first flight test on November 20th only three
out of the four motors spun with enough torque to rotate the propellers. Some attempts to troubleshoot
this issue included reworking the power delivery from the battery to the ESCs by switching wire gauges
and how long the wires are, verifying each individual motor and ESC by creating a testing rig using XT60
connectors, and increasing the fuse amperage from the battery from 75A fuse to a 90A. We discovered that
we had calibrated the Pixhawk incorrectly which caused it to send unequal power to each motor as an
attempt to balance itself. Another issue was during flight, the drone would pitch uncontrollably. This
was resolved by switching the signal wires from each ESC to the flight controller to the correct slots,
allowing the flight controller to accurately correct for pitching instead of trapping itself in a
feedback loop until it crashed. After successfully getting the drone off the ground, it had an issue
where it would yaw uncontrollably but still stabilize itself in every other direction. We had accidently
switched motor positions for the clockwise and counterclockwise spinning which stuck the flight
controller in another feedback loop. Once we had all motors spinning in the right direction our drone
could successfully take off.
We had more issues integrating software. Ardupilot is very specific in what it allows the drone to do
when. Initially, we planned on using the “GUIDED” flight mode while running autonomously. However, this
requires a GPS to properly use, which we do not have. We then switched to the GUIDED_NOGPS mode, however
this is incompatible with the software libraries we are using. The ALT_HOLD mode allows for the controls
we need, however doesn’t permit altitude changes. We decided to use this as our flight mode, sacrificing
the ability to change altitudes for more consistent tracking. This made testing autonomous flight
difficult, as we had to test with the drone already in the air. Another issue was between the drone
control software and the computer vision software. The drone controller initially implemented several
pauses, and reached its commanded positions by setting the motor velocities and waiting. These pauses
prevented the Jetson from running the computer vision protocols. We had to change from commanding
velocities to sending messages over telemetry in order to keep the cv running smoothly, to overriding RC
when we learned the messages were incompatible with our flight mode. We tried to avoid RC override at
first due to the safety implications, however with our ability to easily switch fully to manual controls
we decided it was safe to use RC override commands.